
A few months ago I was showing my friend
Bruno Souza the work I had been doing with my childhood friend and robotics genius,
David Hanson. I had been watching what David was going through in his process of creating life-like robots with the limited industrial software available for motor control. I had suggested to David that binding motors to Blender control structures was a genuinely viable possibility. David talked with his forward looking CEO,
Jong Lee, and they were gracious enough to invite me to Hong Kong to make this exciting idea a reality. Working closely the HRI team (Vytas, Gabrielos, Fabien and Davide) with David s friend and collaborators at
OpenCog (
Ben Goertzel, Mandeep, David, Jamie, Alex and Samuel) a month long creative hack-fest yielded pretty amazing results.
Bruno is an avid puppeteer, a global organizer of java user groups and creator of Juggy the Java Finch, mascot of Java users and user groups everywhere. We started talking about how cool it would be to have a robot version of Juggy. When I was in China I had spent a little time playing with Mark Tilden s RSMedia and various versions of David s hobby servo based emotive heads. Bruno and I did a little research into the ROS Java bindings for the Robot Operating System and decided that if we could make that part of the picture we had a great and fun idea for a JavaOne talk.
Hunting and gathering
I tracked down a fairly priced RSMedia in Alaska, Bruno put a pair of rubber Juggy puppet heads in the mail and we were on our way.
We had decided that we wanted RoboJuggy to be able to run about untethered and the new
RaspberryPi B+ seemed like the perfect low power brain to make that happen. I like the Debian based Raspbian distributions but had lately started using the netinst Pi images. These get your Pi up and running in about 15 minutes with a nicely minimalistic install instead of a pile of dependencies you probably don t need. I d recommend anyone interested I m duplicating our work to stay their journey there:
Raspbian UA Net Installer
Robots seem like an embedded application but ROS only ships packages for Ubuntu. I was pleasantly surprised that there are very good instructions for building ROS from source on the Pi. I ended up following these instructions:
Setting up ROS Hydro on the Raspberry Pi
Building from source means that all your install ends up being isolated (in ROS speak) and your file locations and build instructions end up being subtly current. As explained in the linked article, this process is also very time consuming. One thing I would recommend once you get past this step is to use the UNIX
dd command to back up your entire SD card to a desktop. This way if you make a mess of things in later steps you can restore your install to a pristine Raspbian+ROS install. If your SD drive was on /dev/sdb you might use something like this to do the job:
sudo dd bs=4M if=/dev/sdb gzip > /home/your_username/image date +%d%m%y .gz
Getting Java in the mix
Once you have your Pi all set up with minimal Raspbian and ROS you are going to want a Java VM. The Pi runs the ARM CPU so you need the corresponding version of Java. I tried getting things going initially with OpenJDK and I had some issues with that. I will work on resolving that in the future because I would like to have a 100% Free Software kit for this but since this was for JavaOne I also wanted JDK8, which isn t available in Debian yet. So, I downloaded the Oracle JDK8 package for ARM.
Java 8 JDK for ARM
At this point you are ready to start installing the ROS Java packages. I m pretty sure the way I did this initially is wrong but I was trying to reconcile the two install procedures for ROS Java and ROS Hydro for Raspberry Pi. I started by following these directions for ROS Java but with a few exceptions (you have to click the install from source link in the page to see the right stuff:
Installing ROS Java on Hydro
Now these instructions are good but this is a Pi running Debian and not an Ubuntu install. You won t run the apt-get package commands because those tools were already installed in your earlier steps. Also, this creates its own workspace and we really want these packages all in one workspace. You can apparently chain workspaces in ROS but I didn t understand this well enough to get it working so what I did was this:
> mkdir -p ~/rosjava
> wstool init -j4 ~/rosjava/src https://raw.github.com/rosjava/rosjava/hydro/rosjava.rosinstall
> source ~/ros_catkin_ws/install_isolated/setup.bash > cd ~/rosjava # Make sure we've got all rosdeps and msg packages.
> rosdep update
> rosdep install --from-paths src -i -y
and then copied the sources installed into ~/rosjava/src into my main ~/ros_catkin_ws/src. Once those were copied over I was able to run a standard build.
> catkin_make_isolated --install
Like the main ROS install this process will take a little while. The Java gradle builds take an especially long time. One thing I would recommend to speed up your workflow is to have an x86 Debian install (native desktop, QEMU instance, docker, whatever) and do these same build from source installs there. This will let you try your steps out on a much faster system before you try them out in the Pi. That can be a big time saver.
Putting together the pieces
Around this time my RSMedia had finally showed up from Alaska. At first I thought I had a broken unit because it would power up, complain about not passing system tests and then shut back down. It turns out that if you just put the D batteries in and miss the four AAs that it will kind of pretend to be working so watch for that mistake. Here is a picture of the RSMedia when it first came out of the box:

Other parts were starting to roll in as well. The rubber puppet heads had made their way through Brazilian customs and my
Pololu Mini Maestro 24 had also shown up as well as the my servo motors and pan and tilt camera rig. I had previously bought a set of 10 motors for goofing around so I bought the pan and tilt rig by itself for about $5(!) but you can buy a complete set for around $25 from a number of EBay stores.
Complete pan and tilt rig with motors for $25
A bit more about the Pololu. This astonishing little motor controller costs about $25 and gives you control of 24 motors with an easy to use and high level serial API. It is probably also possible to control these servos directly from the Pi and eliminate this board but that will be genuinely difficult because of the real-time timing issues. For $25 this thing is a real gem and you won t regret buying it.
Now it was time to start dissecting the RSMedia and getting control of its brain. Unfortunately a lot of great information about the RSMedia has floated away since it was in its heyday 5 years ago but there is still some solid information out there that we need to round up and preserve. A great resource is the SourceForge based website here at
http://rsmediadevkit.sourceforge.net.
That site has links to a number of useful sites. You will definitely want to check out their wiki. To disassemble the RSMedia I followed their instructions. I will say, it would be smart to take more pictures as you are going because they don t take as many as they should. I took pictures of each board and its associated connections as dismantled the unit and that helped me get things back together later. Another important note is that if all you want to do is solder onto the control board and not replace the head then its feasible to solder the board in place without completely disassembling the unit. Here are some photos of the dis-assembly:


Now I also had to start adjusting the puppet head, building an armature for the motors to control it and hooking it into the robot. I need to take some more photos of the actual armature. I like to use cardboard for this kind of stuff because it is so fast to work with and relatively strong. One trick I have also learned about cardboard is that if you get something going with it and you need it to be a little more production strength you can paint it down with fiberglass resin from your local auto store. Once it dries it becomes incredibly tough because it soaks through the fibers of the cardboard and hardens around them. You will want to do this in a well ventilated area but its a great way to build super tough prototypes.
Another prototyping trick I can suggest is using a combination of Velcro and zipties to hook things together. The result is surprisingly strong and still easy to take apart if things aren t working out. Velcro self-adhesive pads stick to rubber like magic and that is actually how I hooked the jaw servo onto the mask. You can see me torturing its first initial connection here:
Since the puppet head had come all the way from Brazil I decided to cook some chicken hearts in the churrascaria style while I worked on them in the garage. This may sound gross but I m telling you, you need to try it! I soaked mine in soy sauce, Sriracha and chinese cooking wine. Delicious but I digress.

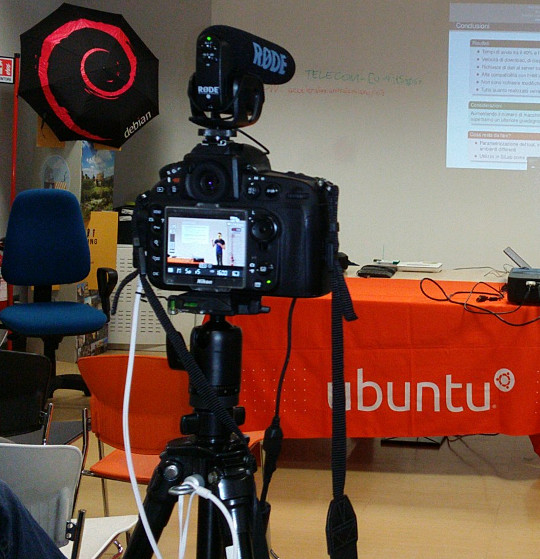
As I was eating my chicken hearts I was also connecting the pan and tilt armature onto the puppet s jaw and eye assembly. It took me most of the evening to get all this going but by about one in the morning things were starting to look good!
I only had a few days left to hack things together before JavaOne and things were starting to get tight. I had so much to do and had also started to run into some nasty surprises with the ROS Java control software. It turns out that ROS Java is less than friendly with ROS message structures that are not built in . I had tried to follow the provided instructions but was not (and still have not) been able to get that working.
Using unofficial messages with ROS Java
I still needed to get control of the RSMedia. Doing that required the delicate operation of soldering to its control board. On the board there are a set of pins that provide a serial interface to the ARM based embedded Linux computer that controls the robot. To do that I followed these excellent instructions:
Connecting to the RSMedia Linux Console Port
After some sweaty time bent over a magnifying glass I had success:

I had previously purchased the USB-TTL232 accessory described in the article from Dallas awesome
Tanner Electronics store in Dallas. If you are a geek I would recommend that you go there and say hi to its proprietor (and walking encyclopedia of electronics knowledge) Jim Tanner.
It was very gratifying when I started a copy of minicom, set it to 115200, N, 8, 1, plugged in the serial widget to the RSMedia and booted it up. I was greeted with a clearly recognizable Linux startup and console prompt. At first I thought I had done something wrong because I couldn t get it to respond to commands but I quickly realized I had flow control turned on. Once turned off I was able to navigate around the file system, execute commands and have some fun. A little research and I found this useful resource which let me get all kinds of body movements going:
A collection of useful commands for the RSMedia
At this point, I had a usable set of controls for the body as well as the neck armature. I had a controller running the industry s latest and greatest robotics framework that could run on the RSMedia without being tethered to power and I had most of a connection to Java going. Now I just had to get all those pieces working together. The only problem is that time was running out and I only had a couple of days until my talk and still had to pack and square things away at work.
The last day was spent doing things that I wouldn t be able to do on the road. My brother
Erik (and fantastic artist) came over to help paint up the juggy head and fix the eyeball armature. He used a mix of oil paint, rubber cement which stuck to the mask beautifully.
I bought battery packs for the USB Pi power and the 6v motor control and integrated them into a box that could sit below the neck armature. I fixed up a cloth neck sleeve that could cover everything. Luckily during all this my beautiful and ever so supportive girlfriend Becca had helped me get packed or I probably wouldn t have made it out the door.
Welcome to San Francisco
THIS ARTICLE IS STILL BEING WRITTEN
 Many people worked on finishing DEP 5. I think that the blog of
Lars does not show enough how collective
the effort was.
Looking in the specification's
text,
one finds:
Many people worked on finishing DEP 5. I think that the blog of
Lars does not show enough how collective
the effort was.
Looking in the specification's
text,
one finds:
 Julian has
 At Collabora, we use SparkleShare to store all sorts of internal documents, and it s being used by users not
familiar with command line interfaces too. Unfortunately, the version we
At Collabora, we use SparkleShare to store all sorts of internal documents, and it s being used by users not
familiar with command line interfaces too. Unfortunately, the version we  Since ages I wanted have replaced this freaking backup solution of our Network Equipment based on some hacky shell scripts and
  Transcoding video from one format to another seems to be a bit of a
black art. There are many tools that allow doing this kind of stuff, but
one issue that most seem to have is that they're not very well
documented.
I ran against this a few years ago, when I was first doing video work
for FOSDEM and did not yet have proper tools to do the review and
transcoding workflow.
At the time, I just used mplayer to look at the .dv files, and wrote a
text file with a simple structure to remember exactly what to do with
it. That file was then fed to a perl script which wrote out a shell
script that would use the
Transcoding video from one format to another seems to be a bit of a
black art. There are many tools that allow doing this kind of stuff, but
one issue that most seem to have is that they're not very well
documented.
I ran against this a few years ago, when I was first doing video work
for FOSDEM and did not yet have proper tools to do the review and
transcoding workflow.
At the time, I just used mplayer to look at the .dv files, and wrote a
text file with a simple structure to remember exactly what to do with
it. That file was then fed to a perl script which wrote out a shell
script that would use the 
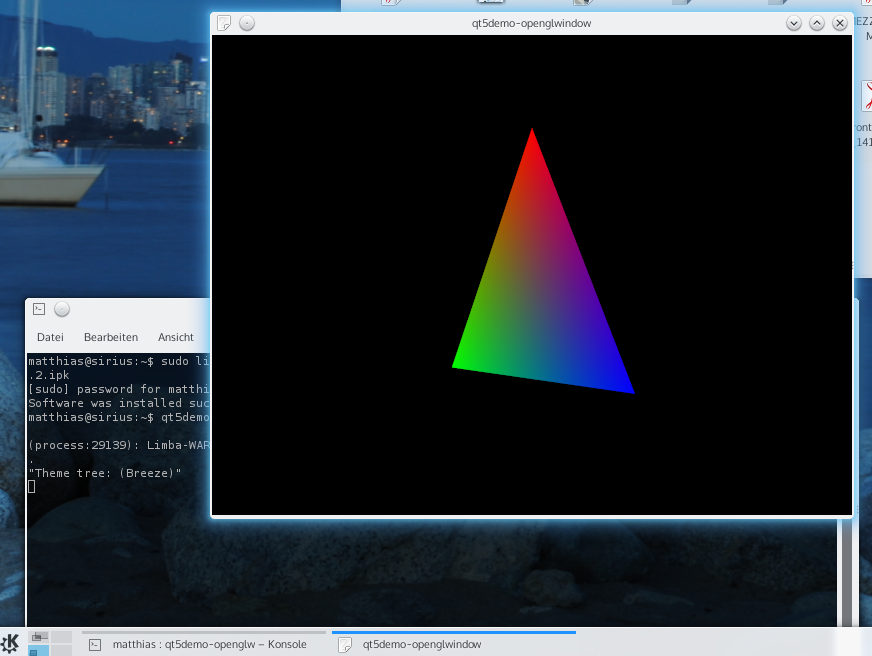
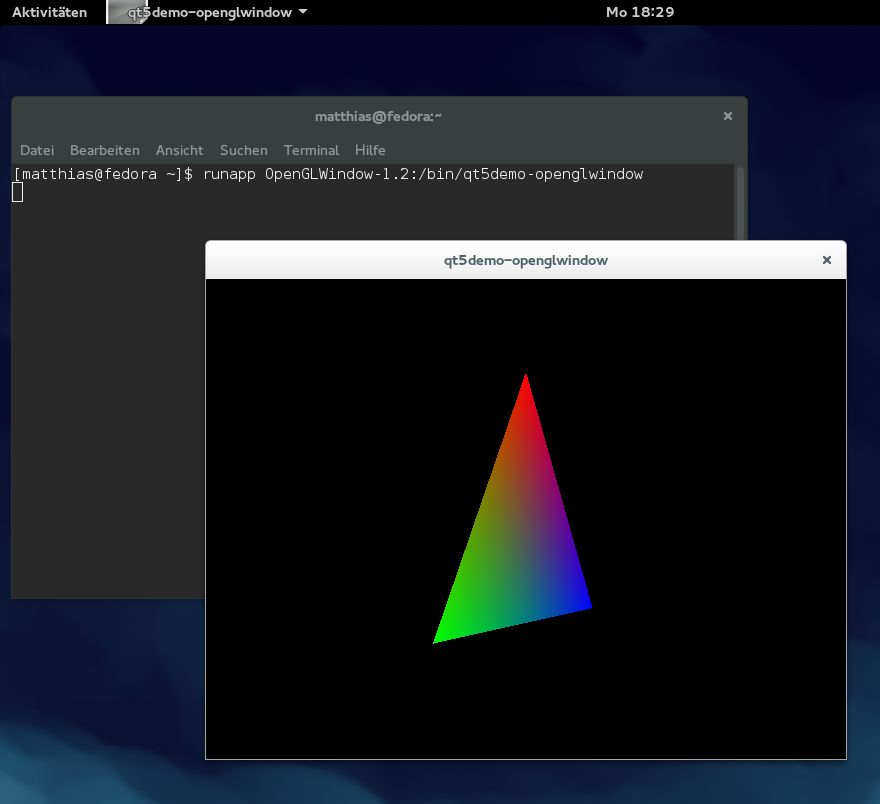
 After seeing what the Wildfly (formerly JBoss AS) and Liferay combo does to
  Earlier today I came across some classical sheet music that included a "playalong" CD, just like a regular recording except it omits the solo cello part. After a quick listen it became clear there were two problems:
 Next, we rip the material from the CD:

 I was unable to find a good place that describes how to create a simple
self-hosted email setup. The most surprising discovery was, how much already
works after:
I was unable to find a good place that describes how to create a simple
self-hosted email setup. The most surprising discovery was, how much already
works after:


 Cleaning up X server warnings
So I was sitting in the Narita airport with a couple of other free
software developers merging X server patches. One of the developers
was looking over my shoulder while the X server was building and
casually commented on the number of warnings generated by the
compiler.
I felt like I had invited someone into my house without cleaning for
months embarrassed and ashamed that we d let the code devolve into
this state.
Of course, we ve got excuses the X server code base is one of the
oldest pieces of regularly used free software in existence. It was
started before ANSI-C was codified. No function prototypes, no
const , no void * , no enums or stdint.h. There may be a few
developers out there who remember those days (fondly, of course), but
I think most of us are glad that our favorite systems language has
gained a lot of compile-time checking in the last 25 years.
We ve spent time in the past adding function prototypes and cleaning
up other warnings, but there was never a point at which the X server
compiled without any warnings. More recently, we ve added a pile of
new warning flags when compiling the X server which only served to
increase the number of warnings dramatically.
The current situation
With the master branch of the X server and released versions of the
dependencies, we generate 1047 warnings in the default build.
-Wcast-qual considered chatty
The GCC flag, -Wcast-qual, complains when you cast a pointer and
change the const qualifier status. A very common thing for the X
server to do is declare pointers as const to mark them as immutable
once assigned. Often, the relevant data is actually constructed once
at startup in allocated memory and stored to the data
structure. During server reset, that needs to be freed, but free
doesn t take a const pointer, so we cast to (void *), which
-Wcast-qual then complains about. Loudly.
Of the 1047 warnings, 380 of them are generated by this one warning
flag. I ve gone ahead and just disabled it in util/macros for now.
String constants are a pain
The X server uses string constants to initialize defaults for font
paths, configuration options, font names along with a host of other
things. These end up getting stored in variables that can also take
allocated storage. I ve gone ahead and declared the relevant objects
as const and then fixed the code to suit.
I don t have a count of the number of warnings these changes fixed;
they were scattered across dozens of X server directories, and I was
fixing one directory at a time, but probably more than half of the
remaining warnings were of this form.
And a host of other warnings
Fixing the rest of the warnings was mostly a matter of stepping
through them one at a time and actually adjusting the code. Shadowed
declarations, unused values, redundant declarations and missing printf
attributes were probably the bulk of them though.
Changes to external modules
Instead of just hacking the X server code, I ve created patches for
other modules where necessary to fix the problems in the right
place.
Cleaning up X server warnings
So I was sitting in the Narita airport with a couple of other free
software developers merging X server patches. One of the developers
was looking over my shoulder while the X server was building and
casually commented on the number of warnings generated by the
compiler.
I felt like I had invited someone into my house without cleaning for
months embarrassed and ashamed that we d let the code devolve into
this state.
Of course, we ve got excuses the X server code base is one of the
oldest pieces of regularly used free software in existence. It was
started before ANSI-C was codified. No function prototypes, no
const , no void * , no enums or stdint.h. There may be a few
developers out there who remember those days (fondly, of course), but
I think most of us are glad that our favorite systems language has
gained a lot of compile-time checking in the last 25 years.
We ve spent time in the past adding function prototypes and cleaning
up other warnings, but there was never a point at which the X server
compiled without any warnings. More recently, we ve added a pile of
new warning flags when compiling the X server which only served to
increase the number of warnings dramatically.
The current situation
With the master branch of the X server and released versions of the
dependencies, we generate 1047 warnings in the default build.
-Wcast-qual considered chatty
The GCC flag, -Wcast-qual, complains when you cast a pointer and
change the const qualifier status. A very common thing for the X
server to do is declare pointers as const to mark them as immutable
once assigned. Often, the relevant data is actually constructed once
at startup in allocated memory and stored to the data
structure. During server reset, that needs to be freed, but free
doesn t take a const pointer, so we cast to (void *), which
-Wcast-qual then complains about. Loudly.
Of the 1047 warnings, 380 of them are generated by this one warning
flag. I ve gone ahead and just disabled it in util/macros for now.
String constants are a pain
The X server uses string constants to initialize defaults for font
paths, configuration options, font names along with a host of other
things. These end up getting stored in variables that can also take
allocated storage. I ve gone ahead and declared the relevant objects
as const and then fixed the code to suit.
I don t have a count of the number of warnings these changes fixed;
they were scattered across dozens of X server directories, and I was
fixing one directory at a time, but probably more than half of the
remaining warnings were of this form.
And a host of other warnings
Fixing the rest of the warnings was mostly a matter of stepping
through them one at a time and actually adjusting the code. Shadowed
declarations, unused values, redundant declarations and missing printf
attributes were probably the bulk of them though.
Changes to external modules
Instead of just hacking the X server code, I ve created patches for
other modules where necessary to fix the problems in the right
place.